You can upload Microsoft Word, other Microsoft Office files, and PDFs into the Cascade CMS. All files should be stored in the appropriate /files/ subfolder within your site’s Cascade folders.
Is it…
- a new file? Upload it.
- an updated file? Replace the original.
- Does the updated file have a different file type? (e.g., .docx instead of .pdf) Let us know.
Accessible Files
Be sure to run an accessibility check on your file before you upload it to the CMS. Learn more about accessible PDFs. This applies to both new uploads and replaced files.
Uploading a File
If you are updating a file that is already on the website, Replace the File instead of uploading a new version. Using the “Replace” process is critical to ensure that links are not broken.
Navigate to your website’s files subfolder, and then into the appropriate folder there so you're viewing its contents.
Choose Add Content > File. The editing window will open.
-
Placement Folder: This always defaults to the current folder that you’re in. If it is not showing the correct files subfolder, click the button and browse to and select your website’s _files subfolder, located under the main folder in the Cascade CMS. If you were already viewing the files subfolder, then it will already be selected. Click the blue Choose button to select the folder.
-
In the dotted-line box, either drag and drop the file from your computer, or browse to and select the file from your computer. (If the File Name field is already filled in, you will need to edit it again—see below.)
-
File Name: The file title automatically appears when a file is selected. If you want to edit it, go ahead, but do not delete the file extension (.pdf, etc.). Without the correct file extension, Cascade will not know what kind of file it is and any link to it will not work.
The File Name field must meet the following requirements (if Cascade gives you a red-text message, just click on use suggested link):-
Lowercase only, spaces between words replaced with hyphens, and leading and trailing spaces are not allowed. Example: annual-report-2021
-
When complete, choose Preview Draft. Then click Submit > Check Content and Submit. On the following page, click the Start Workflow button.
Replacing a File
Browse to your website’s files subfolder, located under the main folder in the Cascade CMS.
- Navigate to and click on the file to be replaced.
- Choose Edit.
- In the dotted-line box, either drag and drop the file from your computer, or browse to and select the file from your computer.
- When complete, choose Preview Draft. Then click Submit > Check Content and Submit. On the following page, click the Start Workflow button and proceed through workflow as normal.
That’s it! When the replaced file is published, all pages that link to the file will automatically download the new version.
Note: This is the same easy process used when replacing images.
Replacing With a Different File Type
If needed, a different file type can be used to replace a file that is already in Cascade. However, you must let the Digital Team know when doing this to make sure that any links to the file update correctly.
PDFs
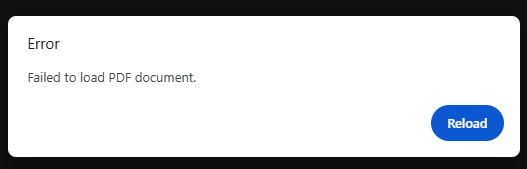
- When replacing a PDF with another file type, the preview screen will show that the file is unable to load (see image below).
Word and Other Office files
- When replacing a Word file with another file type, the preview screen will not show an error. But the file cannot be opened after it’s downloaded.
To fix this, include a comment that this is a “new file type” in the workflow when submitting the file. This alerts the Digital Team to rename the file and update any pages that are linked to it.