Photo galleries are a great way to display multiple photos on your website. They will show visitors all of your photos at once, instead of making them wait to see each one as in a carousel. There are four types of photo gallery layouts: Mosaic, Cascading, Justified, and Slider.
The initial setup of a photo gallery isn’t hard, but there are a number of steps. Please read through the instructions below.
1. Get Started
To make a photo gallery, you’ll first create a Media Gallery Page and a gallery block. And that’s easy.
-
Enter the folder where you want the photo gallery to appear, by clicking on the folder’s View Folder arrow. Remember that the folder layout in Cascade mirrors the menu navigation on the website.
-
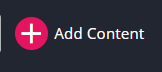 Click on (+) Add Content and then select Media Gallery > Media Gallery. This creates a gallery subfolder containing the media gallery index page and a gallery block.
 - Leave the folder name as “media-gallery,” or rename it if that helps you stay organized.
- Click Submit.
The media gallery index page will automatically display any image uploaded into the same folder (only) as the gallery block.
2. Upload the Images
At this time, photo uploads can only be done individually.
If the photos are already uploaded to Cascade, but are in a different folder, please submit an ihelp ticket with details, and the Digital Team will move the photos to your media-gallery folder.
-
Enter the media gallery folder by clicking the View folder arrow when you mouse over the folder name.
-
Click the (+) Add Content link at the top.
-
Choose Upload Images.
-
The Placement Folder will default to the folder you were last in, so be certain that this shows the media gallery folder you just created. If it’s not correct, it can be changed here.
-
Drag and drop the image into the upload section, or select the image from your computer.
-
You must enter a Title. If you don’t, the photo will not appear on the gallery page.
- Go to the Metadata tab, click in the Title field, and enter the text. This will appear as the photo’s caption.
-
Edit the file name, if needed.
Caution: Do not remove the file extension (e.g., .jpg, .png). Without a valid file extension, the image cannot appear on the website. -
Click Preview Draft > Submit > Check Content and Start Workflow.
-
Continue uploading all images that will appear in the photo gallery.
3. Edit the Gallery Block
Open the _gallery block for editing.
- In the Title field, edit the name to clarify which gallery it is (helpful if you have more than one). This name is only seen by website editors. Include the word “gallery” within the name.
-
Gallery Settings:
You have your choice of four types of photo gallery layouts. Each type will display the photo thumbnails in different configurations.-
Mosaic: Thumbnails are varying sizes and may overlap, making for a fun overview of all the images.
-
Cascading (Fixed Width): All thumbnails will have the same width. This requires you to enter the image width in pixels that the thumbnails will display. Note: the full width of all iup.edu web pages is 750 pixels.
-
Justified (Fixed Height): All thumbnails will have the same height. This requires you to enter the image height in pixels that the thumbnails will display.
-
Slider: Thumbnails will display in a single row with controls to side-scroll the images. This requires you to enter the image width in pixels that the thumbnails will display. Note: the full width of all iup.edu web pages is 750 pixels.
-
-
Options:
You can select one, both, or neither of the following two options:-
Enable Lightbox Pop-up: Allows each thumbnail to be clicked to open a full-size view
-
Randomize Order: Randomizes the display of thumbnails
-
-
When done, click Preview Draft > Submit > Check Content and Submit, and click the checkmark on the Spelling screen. On the next screen, click Start Workflow in the top-right.
4. Edit the Index Page
Open the media gallery index page for editing.
-
Display Name is the actual name of the page.
-
Description is a summary of what the page is about. This can appear in search results and social media shares, so don’t simply repeat the display name. Here’s more about writing summaries.
The Media Gallery Page section is the main part of the page.
-
Top Content: You have the option of adding a full-width image, carousel, or video to the top of the page, or you can leave the setting at None.
-
Content: You should add introductory text here, explaining what the page is about.
-
Gallery: The gallery block that will hold your images is pre-selected. Don’t change this unless you want to display a different gallery block.
-
Preview the page. You can select either Show Edit Preview at the top, for an as-you-edit preview of the page; or Preview Draft, which will display your edited page, which you can then either submit or keep editing.
-
Make sure all of the photos are appearing! If any do not appear, you’ll need to edit the photo(s) and make sure the Title field has a caption (see section 2 above). Resubmit any edited photos. The gallery index page should not be submitted until it looks the way you expect.
When your edits are complete and you’re satisfied with the preview, submit the index page into workflow. When the photo gallery page is published, it will automatically appear in the website menu.