Digital images have two kinds of size:
- Dimensions: Height and width in pixels
- File Size: Size in KB or MB
These are separate measurements, but both must be accounted for. (For our purposes, image dimensions are always expressed in pixels.)
Reducing the dimensions and the file size results in a smaller download for site visitors, meaning that the website will load and respond faster for them.
Don't enlarge an image's size. This can result in fuzzy, grainy, or distorted photos.
Note: The precise instructions may vary depending on your version of Photoshop. Please use the information below as a guide.
Steps for Best Photos
-
Resolution
Check and adjust this first -
Resize/Crop
Change the size of your image -
Save
Compress the file for best performance -
Upload
Upload the image to Cascade
Image Resolution
You will often be working with images that are larger than what is needed for your website/web page. The first step is making sure the resolution is correct, especially before cropping the image.
Check the Image Resolution
- From the Photoshop toolbar, click on Image > Image Size
-
In the Image Size box, look at the number in the Resolution field. If it is not “72,” you will need to lower the resolution:
-
Remove the checkmark next to Resample Image, located near the bottom of the Image Size window.
-
Change the Resolution to 72.
-
Replace the checkmark next to Resample Image.
-
-
If the image does not need to be cropped, you can now adjust the image width (see below).
-
If cropping is needed, please do that before adjusting the width. See the Cropping Images section below.
-
Adjust the Image Width
See the recommended image sizes for the IUP website.
- Important: You can make the image smaller, but never make it larger! Doing so will cause the image to become grainy, pixelated, or otherwise of a lower quality.
In the Image > Image Size box, first be certain that the Resample Image option at the bottom is checked.
-
Verify that the dropdown choice for the width is “Pixels.” Change the width to the desired size (see below). Do not edit the height—this should adjust automatically.
-
Image on a regular webpage:
-
Full-width image = 750 pixels
-
Half-width and below = 737 pixels
Remember that the final appearance of the image when you place it on your web page will be adjusted by aligning and sizing the image with the correct styles.
-
-
Image in a carousel
-
Varies. See the tables on Preparing Images for a Carousel
-
-
-
Click OK.
-
If the image edits are complete, then compress and save the file for the web (see section below).
-
If cropping is needed, see the Cropping the Image section below.
-
Cropping Images
Use the Marquee tool or edit the Canvas Size to crop your images to the needed size.
Did you check the image resolution? Take care of this before cropping or resizing (see section above).
Selecting the Image
-
With Photoshop open, right-click within the ruler that borders the top and left sides. Make sure "Pixels" is selected.
-
If the rulers are not appearing, click on View and then choose Rulers.
-
-
-
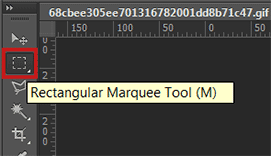
Open the image you want to crop. Select the Rectangular Marquee Tool from the toolbar.
-
Holding the left mouse button down, drag to select the area of the image that you want to keep (everything outside of the dotted line is what you want to delete). As you drag, a little pop-up box will display the width and height in pixels of the selected area.
-
-
- If you want the box to be a precise size, do your best to get the numbers correct. If you are unable to be exact, make it a little larger than needed. The image cropping can be finished by changing the canvas size (see below).
-
When the selected box is the desired size, release the mouse button.
-
-
Crop the image by selecting Image, and then Crop. All of the image that is outside of the selected area will be deleted.If the image looks the way you want, then reduce its size to either 737 or 750 pixels wide.
-
Alternately, if the image needs further cropping to reach the needed size, you can either use the Rectangular Marquee Tool again, or edit the canvas size.
-
Canvas Size refers to the width and the height of the layer, or the working space, upon which your image is sitting. Enlarging the canvas size will enlarge the working space around the picture without enlarging the picture itself.
Decreasing the canvas size may cut away part of the image if the new canvas size is smaller then the image in height and/or width.
-
-
Choose Image > Canvas Size
-
Clicking within the Anchor box will adjust the direction that the canvas is enlarged. For example, choosing the left center square will affect the image size in all directions except for the left. Choosing the center square will trim the canvas equally on all sides. Choose carefully, based upon what part of the image needs to be trimmed. If you make a mistake, undo it by pressing Ctrl+Z on your keyboard.
-
-
Decrease the width and/or height in pixels. You will receive a warning that the new canvas size is smaller than the current canvas size, and that some clipping of the image will occur. Click Proceed.
-
Note: Choosing larger values than the image size will not increase the size of the image, just the background that it sits upon. So do not make the height or width larger.
-
-
-
If you need to continue adjusting the image resolution, go back to the Image Resolution section (see section above).
-
If your the image edits are complete, then compress and save the file (see section below).
Saving the Image
Usig the Save for Web option compresses the image file for faster performance.
-
Under File , choose Export > Save for Web .
-
At the top, choose the Optimized tab. In the right-hand frame, look for the dropdown menu at the upper right (located underneath the Preset option). Choose the correct file format for your image:
-
Photos: JPG
-
Line art, logos, etc.: GIF or PNG-8
-
-
Click the Save... button. Choose a location and give it a descriptive filename. Adding the width in pixels to the filename will help keep things organized, such as "Road by Dan Simpson 271 px.jpg" (without the quotes).
-
Note: Make certain that the image you want to upload does not contain any punctuation in the filename. Commas, apostrophes, etc. can cause the image to not appear properly on the website. Edit the filename before uploading the image.
-
-
-
Close the original image in Photoshop. Do not save changes to the original image (you may want to use the original for other purposes or sizes later).
Upload the image to the CMS “images” folder or subfolder as normal, either on its own or while placing it into a web page or into a news post.