Tables are meant to display data in a table with one or more rows and columns. A table should contain row headers, column headers, or both.
Tables should not be used for lists or in place of columns of text.
Data tables present tabular information in a grid, or matrix, and have columns or rows that show the meaning of the information in the grid. Readers can visually scan a table and should be able to quickly make associations between data in the table and their appropriate row and/or column headers.
Making a Table Grid
Here's how to create the initial rows and columns of your table.Open the page for editing, and place your cursor on an empty paragraph line. From the formatting toolbar, click on Table, and then hover over the Table flyout menu. Move your mouse until the desired number of rows and columns are highlighted, and then click once to add the table.
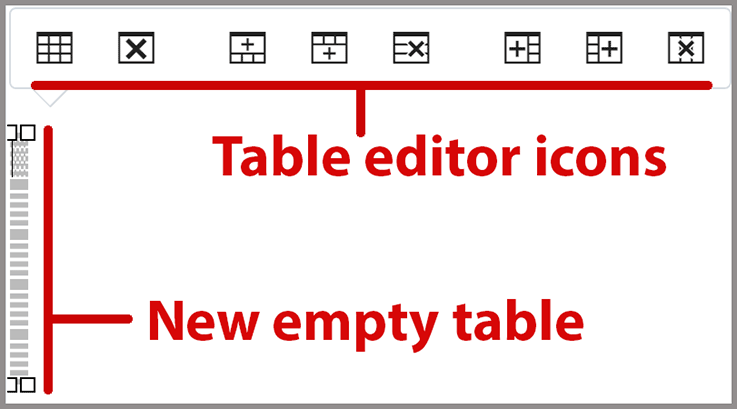
The table editor lets you add or remove rows and columns. You can also view the table's properties, or even delete the whole table.
At first, the table cells will have zero width. However, your cursor will be seen blinking in the last cell. Use the arrow keys on your keyboard to move the cursor from one cell to another: left or right, and up or down. (If you move the cursor out of the table or click elsewhere on the page, you can use the arrow keys to move the cursor back into the table cells.) You can also use the Tab button on your keyboard to move forward to the next cell (Shift+Tab will move backward).
Place your cursor in the first cell in the top row and begin to type, and the cells in that column will expand to fit. One trick is to start at the first cell and type a few characters, then move to the next cell and repeat. This will give you a workable view of the table, and you can then edit it as needed.
Creating Headers
Adding a table header row (or column) is important, as it identifies the purpose of the cells that it heads and helps people quickly identify the meaning of the information in a table's rows and columns.Accessibility
When headings are correctly applied, they also allow screen-reader users to quickly navigate from heading to heading using the screen reader's heading navigation functionality. (Styling text to be bigger and bolder than the rest may make it look like a heading, but people who cannot see that visual change will not be able to identify the text as a heading.)
Column Headers
The top row of the table is the header, defining the columns underneath.
-
Select the entire top row of the table's header cells (click in the first cell and drag to the right). Right-click, select Cell, and then Cell Properties.
-
Change the Cell type to Header cell.
-
Change the Scope to Column.
- Click Ok.
-
-
Right-click the table's header row, select Row, and then Row Properties.
-
Change the Row type to Header.
- Click Ok.
-
Row Headers
The first column of the table is the header, defining the rows to the right.
-
Select the entire first column of the table's header cells (click in the first cell and drag downward). Right-click and select Cell Properties.
-
Change the Cell type to Header cell.
-
Change the Scope to Row.
- Click Ok.
-
-
Right-click the table's header column and select Row properties.
-
Change the Row type to Header.
- Click Ok.
-
Adding Captions
While it is not necessary for each table to have a caption, a caption is generally very helpful to describe its contents.To add a caption, put your cursor anywhere in the table. The table toolbar will appear.
- Click on the first icon, Table properties.
- Place a check in the box next to Caption and click Ok.
- The caption row will appear at the top of the table. Click into it and type your caption.
Adding/Deleting Rows and Columns
Over time, a table may need to have rows and/or columns added or deleted.When your cursor is within the table, the Table Editor will appear. This is a white horizontal box with eight icons, and it may be above or below the table. It can be hard to notice; see the example here.
The table editor lets you add or remove rows and columns. You can also view the table's properties, or even delete the whole table.