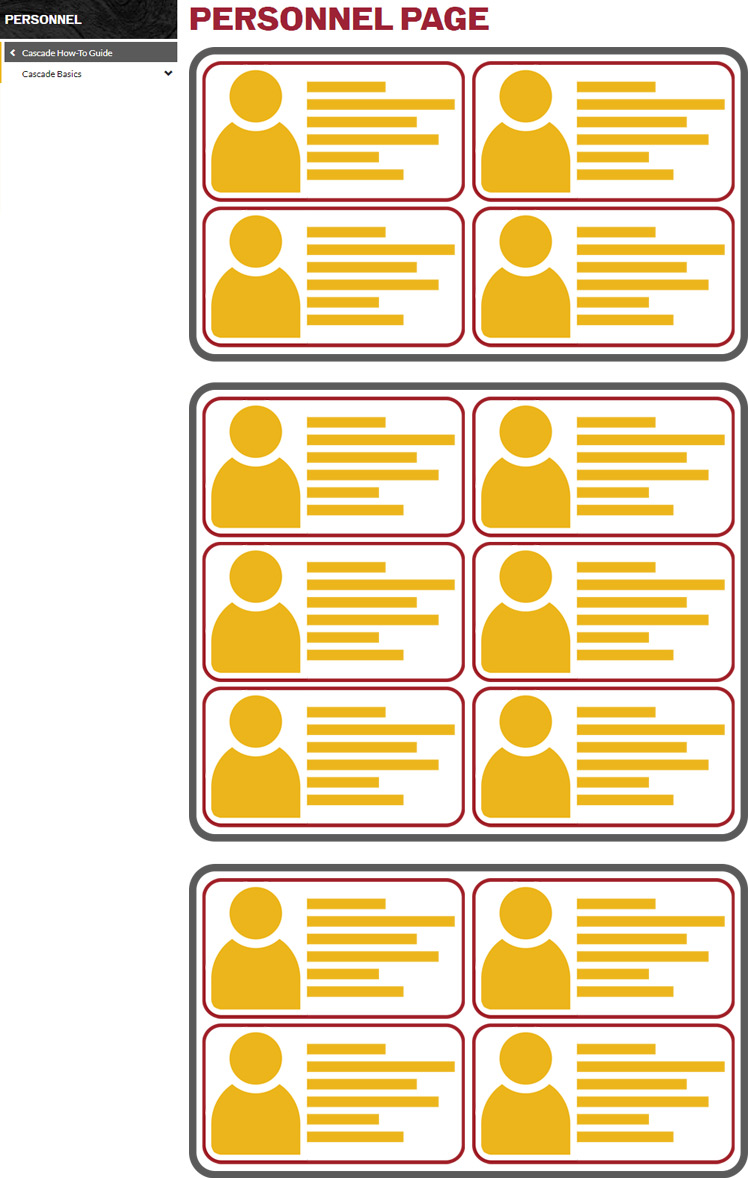
Personnel blocks can be used to present contact and additional information for a single person, multiple people (a group), or multiple groups. Each person’s information appears on the Personnel (or Faculty and Staff) page in a card format.
Individual personnel blocks are created within the Cascade CMS. Those personnel blocks can be placed into a personnel listing block (group), which is usually what appears on the page. Multiple blocks can be inserted on a page. Individual blocks can also be directly added to a page if they are not to be part of a listing block's group. Understand the difference.
Change one person’s information:
- Edit:
your-site/_blocks/personnel/[person's block]
Update the contents of a listing group:
- Edit:
your-site/_blocks/personnel-listing/[listing block]
Adjust which individual or group blocks appear on the Personnel/Faculty and Staff page:
Add a new person:
- Start by Creating a Single Personnel Block
In addition to standard contact information, individual personnel blocks have options to:
- include a link to a personal home page
- add an image
- add extra information in an open text area
Watch a video on editing personnel pages from our Cascade CMS Advanced training course. (IUP login required.)
Understanding the Difference
Personnel Block
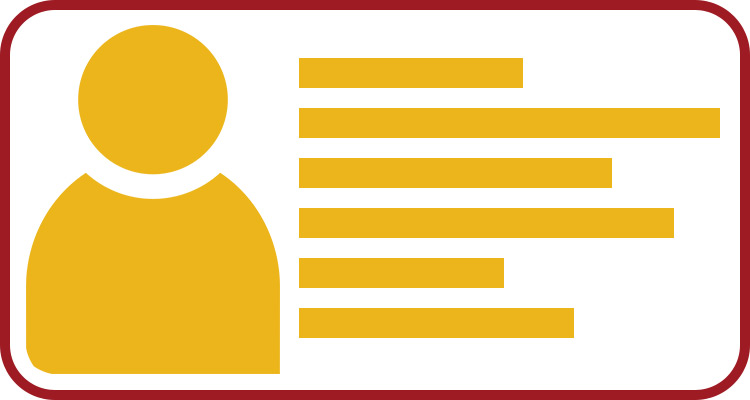
A personnel block is the displayed contact information of a specific employee/individual working within the department. A personnel block can include name, title, contact information, and a headshot of the individual.
Personnel Group Listing
A personnel group listing is a collection of multiple personnel blocks (individual employees) who make up a specific sub-group of personnel within a department. Examples include Department Faculty, Administrative Assistants, Secretaries, Teaching Assistants, etc.

Personnel Page
A personnel (or faculty/staff) page is a page on the IUP website that can contain multiple group listing blocks for those who work within that department.
Edit a Person’s Information (Personnel Block)
Individual person’s blocks are stored in:your-site/_blocks/personnel
Edit a personnel block to update a person’s information. The Personnel or Faculty/Staff page will automatically update to show the update after the block is submitted and published.
Note: The name of the block should be the person’s name. If the block is named “personnel” or is an incorrect name, contact the Digital Team for assistance at web-team@iup.edu.
Create a Single Personnel Block
Follow these steps to create a new individual personnel block in Cascade:
-
Go into your-site/_blocks/personnel subfolder.
-
Click the pink Add Content button at the top of the page.
-
Select Blocks > Personnel.
-
Rename the block. Change the “XHTML/Data Definition Block Name” field to the person’s name, using the format lastname-firstname. Do not leave it as the default “personnel.”
-
In the Placement Folder, ensure the destination directory (folder) is correct:
your site/_blocks/personnel -
Fill out the person’s information. Fields marked with an asterisk are required.
-
When entering phone and/or fax numbers, include the correct hyphens as shown in the examples.
-
If you wish to add additional titles, addresses, and emails, you can do so by clicking the green + button, which appears when you move over or into that section.
-
If you want to add an image, you will choose a file in the Image section. Take note of the width of the image file (in pixels) so you can mark it as either responsive or non-responsive in the Image Size section. (Responsive = 737px wide. Non-responsive = anything less than 737px wide. Learn more about image sizes.)
-
The Extra Information section at the bottom can be used to display any additional information about the individual. This will be displayed on the page as an expandable box below their initial information.
-
Finally, you can choose to include a Homepage Link, which will link to the person’s personal page. If the page is on the iup.edu website, this will be an internal IUP link. If it’s from an external site, you will enter the URL in the text field.
-
Review all of the entered information, and then submit the personnel block for approval in the top right of the window.
Edit a Personnel-Listing (Group) Block
Listing blocks are displayed on your site’s Personnel or Faculty and Staff page. These listing blocks are in the personnel-listing folder:your-site/_blocks/personnel-listing
Each personnel-listing block holds one or more individual personnel blocks.
You can edit a personnel-listing block to add or remove people from the group or to change the name of the group as it appears on the page. Check your Personnel page in Cascade to see the automatic update after the block is submitted and published.
Open the listing block for editing. Mousing over the blocks will cause a pop-up menu to appear.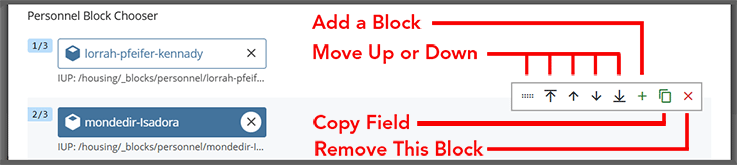
- Add an individual’s block by pressing the green plus sign.
- Click the Choose Block button to select the new individual personnel block.
- Remove an individual’s block by pressing the red X.
- Rearrange the list by choosing the Up or Down arrows, or by drag-and-dropping with the drag handle.
- Duplicate a field by clicking the Copy Field icon.
Create a New Personnel Group Listing
You can create a new group of people to appear on the page (e.g., a new committee, a cohort, etc.). These can use existing or new individual personnel blocks.
Follow these steps to create a Personnel Group Listing block in Cascade:
- Go into your-site/_blocks/personnel-listing subfolder.
-
Click the pink Add Content button at the top of the page.
-
Select Blocks > Personnel Group Listing.
- Rename the block. Change the “XHTML/Data Definition Block Name” field to the group name. (This will not appear on the website.) Do not leave the name as the default "personnel-group-listing-block."
-
In the Placement Folder, ensure the destination directory is correct.
your site/_blocks/personnel-listing -
For the Display Personnel at Full Width? option, select Yes if you wish for the personnel blocks in this group to appear at full page width instead of the standard half-width.
-
In the Personnel Block Choose, click Choose Block and add your previously created Personnel block.
-
To add additional personnel blocks, simply click the green + icon. From there you should be able to add/remove/re-order your personnel blocks as needed.
-
Make sure all of the entered information is correct, then submit the personnel group listing block for approval in the top right of the window.
Add New Listing Block to a Page
After making a new group listing box, you can add it to your Personnel/Faculty and Staff page by following these steps in Cascade:
-
View the page where you want to add a personnel listing, and click the Edit button at the top.
-
Scroll down to the Content Row > Column > Type = Personnel
-
In the Column bar, click the green + sign to add a new group.
-
In the new Column, set the Type to Personnel.
-
Under Personnel Options, you can choose if you’d rather add a single block or a group listing block. To add a personnel-listing block, select Personnel Group Listing Block.
-
Next, set the Column Width. The standard 12 Column Span is usually the best choice.
-
Under Block Chooser, select one of your previously created group listing blocks. (Be sure to choose a block type that matches the option selected in Personnel Options. For instance, if you chose Personnel Group Listing Block, make sure that you choose a Group Listing asset in the block chooser.)
-
If you wish to add multiple listing blocks to the page, do so by creating another Content Row/Column.
-
Preview the page to make sure the listing blocks are displaying the way you want.
-
If someone’s information is incorrect, fix it by editing the individual’s block.
-
If people are in the wrong position within a group, fix it by editing that personnel-listing block.
-
If groups are in the wrong order on a page, continue editing the page and move their columns up or down, then check the Preview again.
-
If someone’s name is repeated, or if odd characters appear instead of a name, then there is a blank field in the selected listing block. Fix it by editing that block.
-
Remember: You can close the page without submitting it, and your draft will be saved. You can come back and continue editing it anytime.
-
-
If the page looks the way you want, you can submit the page for approval in the top right of the window.
Delete a Name
Deleting an individual’s block will remove the person from all personnel pages and groups that use this block.
If the person should still appear on another page or group, then do not delete their block—you should instead edit the personnel-listing block and remove the individual’s block from there.
Caution: Deleted blocks must also be manually removed from listing blocks, or the Personnel page will display an incorrect listing.
- Before deleting a block, check its Relationships and edit those to remove the block from them.
If you are certain that it will not affect any other pages, then you can choose to delete a person’s individual block. See How to Delete Content.