The Projector Control - XPanel application is installed on the instructor PC in each multimedia classroom. Instructors use this interface to control the projector and multimedia equipment.
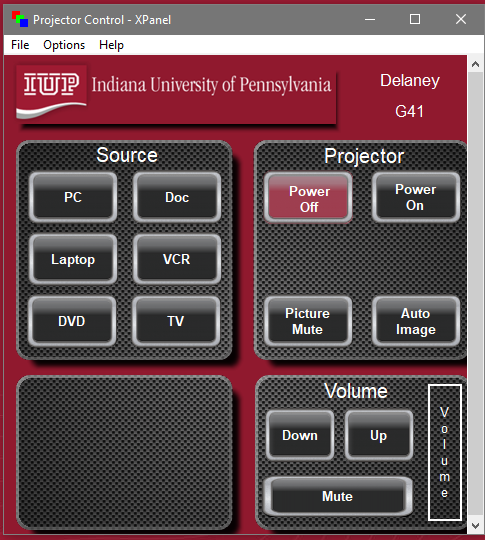
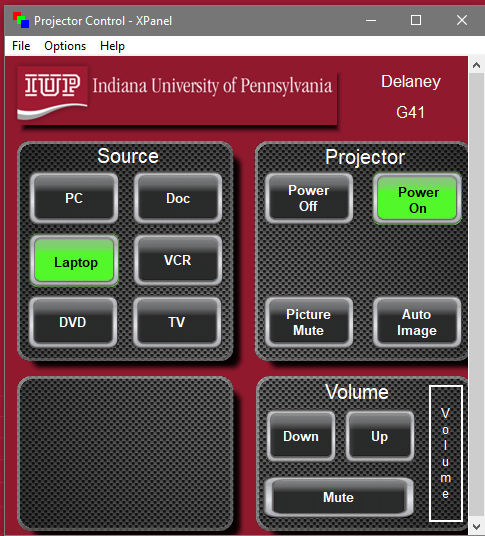
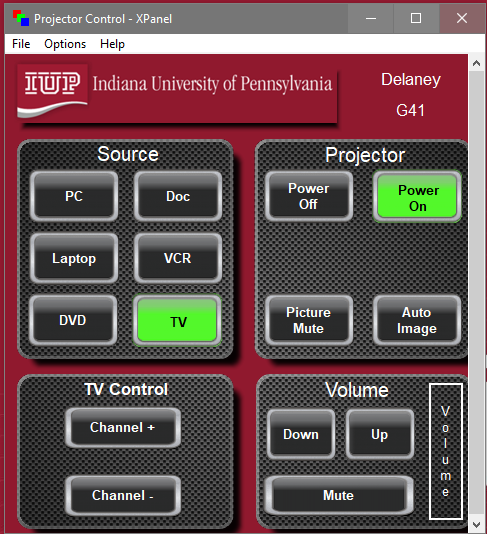
Once you are logged in, the Projector Control app will appear. From the Projector Control screen, you can turn the projector on and off as well as choose the device to use (e.g., DVD, VCR, Document Camera, etc.) Please note: The active device on the Projector Control screen will be green.
Locating Projector Control software
![]()
If Projector Control does not open automatically, or is closed accidentally, look for the Projector Control icon on the desktop or taskbar.
Notes
- Do not change any controls on the equipment in the podium.
- To return the projector to PC mode after using any of the other functions, simply click on the PC button. Remember the active button will be green.
- To adjust the volume of the projector, use the Volume Up and Volume Down buttons located on the control screen. Note that as you switch from mode to mode, the volume is reset to zero percent.
- Do not move or rearrange the multimedia equipment. This will help prevent damage to the equipment.
- Turn off all equipment (including projector) when finished.
For further assistance, please log a ticket in ihelp.
Turning off the projector
Before signing out of the computer, you need to turn off the projector.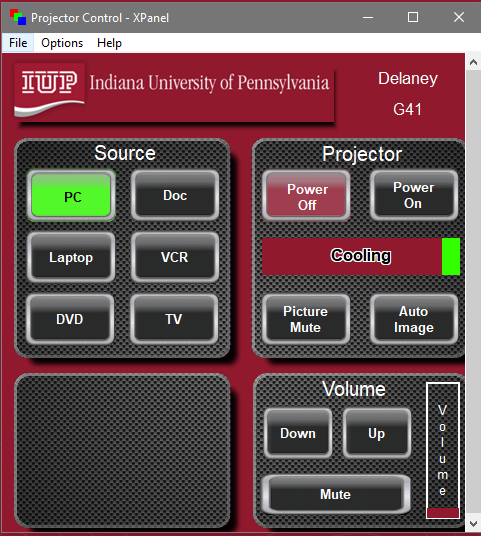
- On the Projector Control screen, click the Power Off button in the Projector section. Once you press the Projector Power button, a message will appear stating that the projector is cooling down. (Figure 10)
- Either log off or shut down the PC.
Turning on the projector

- Go to the Projector Control screen and click the Power On button in the Projector section. Once you press the Projector On button, a message will appear stating that the projector is warming up.
- You will not be able to switch devices until the projector is fully warmed up.
- The projector will default to the last device used.
Using Picture Mute
If you would like to mute the picture, (black out the image appearing on the screen without turning off the projector), simply click the Picture Mute button. To redisplay the image, click the red Picture is Muted button.
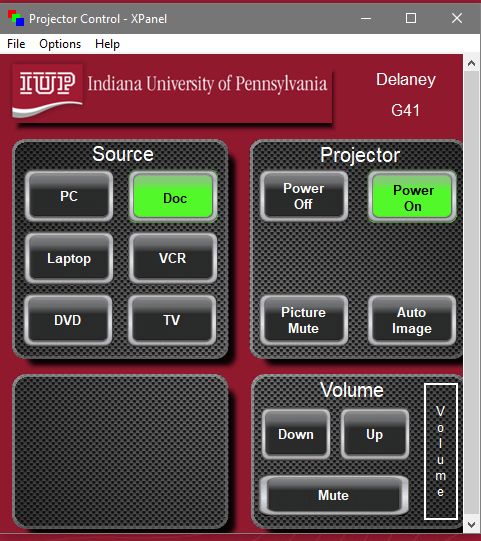
Using the PC
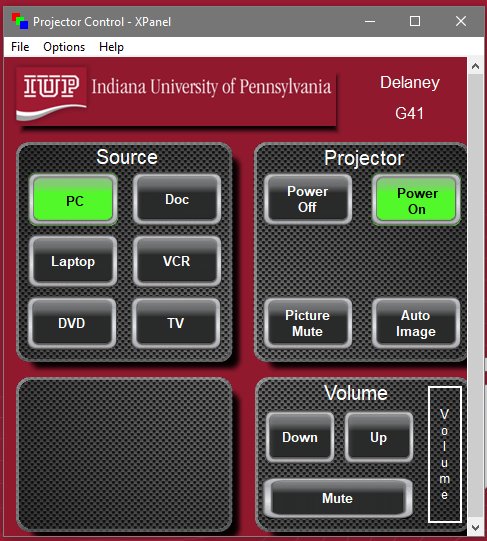
- On the Projector Control screen, switch to PC mode by clicking on PC (Figure 3).
- What you display on the local instructor monitor will also display on the projection screen.
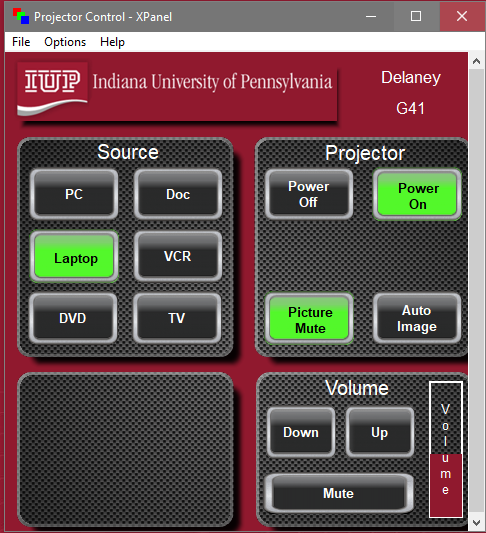
Using a Laptop
- Connect the Laptop using the supplied 15 pin VGA cable or HDMI cable.
- On the Projector Control screen, click on the Laptop button.
Using the Document Camera
- On the Projector Control screen, click on the Doc button.
- Make sure that the document camera is turned on. Lay the document face up on the surface of the document camera.
Using the DVD Player
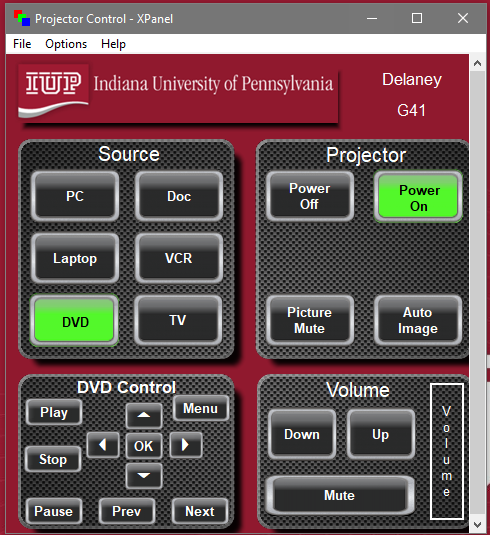
- On the Projector Control screen, switch to DVD mode by clicking on DVD.
- In the multimedia cabinet, make sure that the DVD/VCR combo device is turned on.
- Insert the DVD into the DVD player. You can also control the DVD using the on-screen control buttons.
Using the VHS Player (VCR)
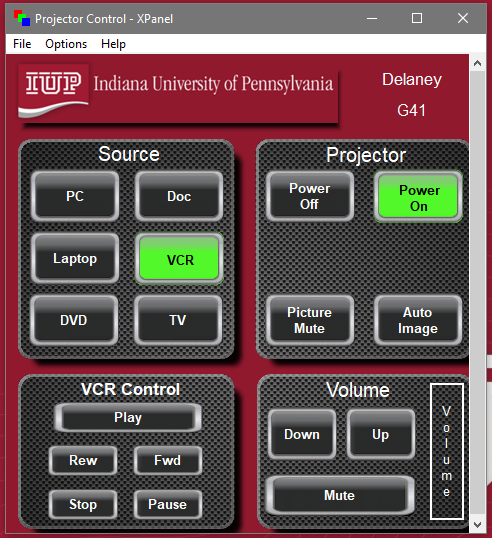
- On the Projector Control screen, switch to VCR mode by clicking on VCR. (Figure 7)
- In the multimedia cabinet, make sure that the DVD/VCR combo device is turned on.
- Insert the video into the VCR. You can also control the VCR using the on-screen control buttons. (Figure 7)
Using the TV Tuner
- On the Projector Control screen, switch to TV Tuner.
- Select a specific channel by using the "Channel +" or "Channel -" buttons.